ucoder (ucode Universal Information Service) associates ucode with information. This service is provided at the following URL: http://lab.ubin.jp/ucoder/ If you set up an account on this website, you can issue up to 100 ucodes. You can also set the association between those ucodes and the information on the Internet on the ucode resolution server. You can print the issued ucode in a tag in QR code format (ucodeQR) and attach it to an object and a place. If the attached ucodeQR is read by a mobile phone, the information set on the ucode resolution server can be retrieved on the mobile phone.
How to use ucoder
Step1: First, log in
By accessing the ucoder website,the screen as shown in Figure 1 will be displayed.
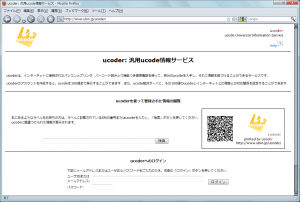
Figure 1: The top page of ucoder
By clicking ”Create an account” at the bottom of the screen,License Agreement and e-mail address entry form will be displayed (Figure 2). Read the License Agreement carefully and agree to it, and then enter your e-mail address in the box and press CREATE ACCOUNT button. In a while, a password will be sent to your e-mail account from the ucoder server.
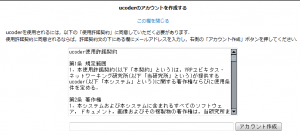
Figure 2: Creating a ucoder account
Once you receive a password, enter your e-mail address and the received password in the ”Login to ucoder” form (Figure 3). Now, you can log in to the ucoder (Figure 4).

Figure 3: Login screen of ucoder
Step 2: Create a blog article
Next, create information to be associated with the issued ucode. Any information will do if it can be browsed on the website. However, in this example, as the information needs to be retrieved by reading the ucode by a mobile phone, the tool that supports mobile phones should be used. Accordingly, the goo blog is used. Create an article by using the goo blog and obtain the URL of the article. For the goo blog, the URL of the article is the link of the date and time of the posting (Figure 5). The URL of the created blog article is:
http://blog.goo.ne.jp/ucodeblog00/e/4e7b0aa488cb611507429158b139a8fa
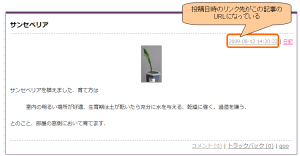
Figure 5: Completed blog article
Step 3: Issue a ucode and associate it with information
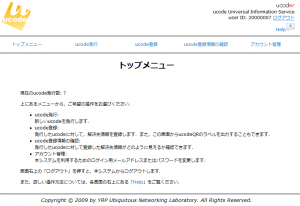
Select ”Issue ucode” in the menu and the number of ucodes to be issued, then press Issue ucode button to issue ucodes. Now, let’s issue a ucode (Figure 6).

Figure 6: ucode issue
When a ucode is issued, the screen will be automatically switched to the “Register ucode” screen and the issued ucodes will be displayed on the list screen. On this screen, associate the ucode with information. Select “URL” on the right of the list, in the column of the resolution information and enter the URL of the blog in the text box below (Figure 7). Press UPDATE button to register the association between the ucode and information on the ucode resolution server.

Figure 7: Registration of ucode resolution information (the information to be associated with ucode)
Step 4: Create a ucode label
The ucode displayed on the ucode list screen is a link (blue letters in Figure 8).
![]()
Figure 8: ucode display on the ucode list screen (blue letters in the left column)
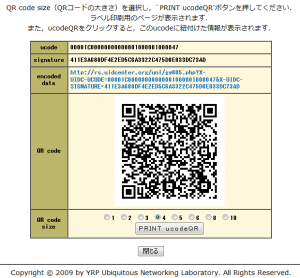
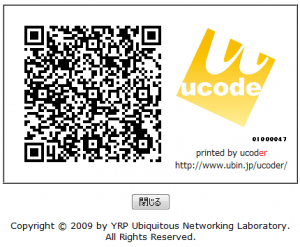
By clicking this link, a new window (or a tab) will be opened and QR code screen will be displayed (Figure 9). Select the label size and press PRINT ucodeQR button to display a label on which ucodeQR is printed (Figure 10). Print and attach it to an object.
Here is an example of attaching a label to potted sansevieria (Figure 11).
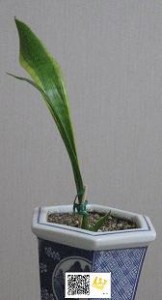
Figure 11: Attaching a label to a potted plant
Step 5: Retrieve information from a ucode
Let’s retrieve information from the ucodeQR of the created label. If the ucodeQR of the label is read by a mobile phone, the URL that includes the issued ucode will be displayed. By accessing this URL, the blog article registered at Step 2 will be displayed (Figure 12).
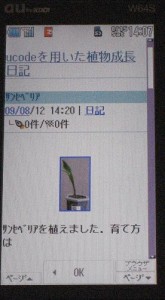
Figure 12: Blog article confirmed by a mobile phone
Now, let’s search on PC. Press ”Log-out” on the upper right of the ucoder screen to log out of ucoder. Enter ”01000047,” the eight digit figure written in the label in the search form of the top page (Figure 13) and press SEARCH button. A blog article in Figure 5 will be displayed.

Figure 13: ucoder search form

